Pomelo - Picture a day #16

So once again I come home on a Monday with no photo from today. I did take some portraits at work today, but nothing I wanted to share in my project. So I found these two Pomelos on the kitchen counter. So I wondered if I could come up with a unique image of these Citrus fruit originating from Southeast Asia. It was really just a guess that these are Pomelos, so I checked Wiki, and sure enough they are.

Pomelos:

jan1-green-palmello-L.jpg
ISO 1000 ƒ/3.5 T 1/60

Here’s the saved JPG from the RAW file:

green-palmello-1-L.jpg

Really didn’t like the yellow cast from the tungsten lights on my dining room table, I know I really should fix this in the camera, but I admit I’m lazy and then forget to set the white balance the next time I shoot. So here are the edits in Aperture(Mac App Link) fixing the white balance and the exposure a bit.

green-palmello-2-L.jpg

Much better, they actually look the right color now. I wanted a final image that displayed the texture of the skin a bit more so into Perfect Effects 3:

green-palmello-XL.jpg

I ran the image through a Bleach Bypass, I really need to look up how the bleach bypass worked in a real darkroom, because I really liked what it did to my Pomelos. Got rid of the brown background and helped highlight the skin. I did save this back to Aperture one last time and used a brush tool to sharpen the stem area. Overall I like this image and I learned more about Pomelos. Especially that they aren’t spelled Pomellos,

Soccer Ball- Picture a day #15

When you’re 6 years old life is all about motion. Every waking moment is spent thinking about what to do next or so it seems. So on weekends we play.

jan1-soccer-ball-L.jpg

This is a fairly simple photo, but of all the ones I took, I liked this image. Here’s the saved jpg from the RAW file:

soccer-ball-2-L.jpg

And here are my edits within Aperture(Mac App Link):

soccer-ball-1-L.jpg

This is one of the reasons I like taking a picture a day. If you don’t have your camera with you you aren’t able to grab simple captures. I think the vignette helps setoff the soccer ball.

Gluten Free Dairy Free Lemon Cake

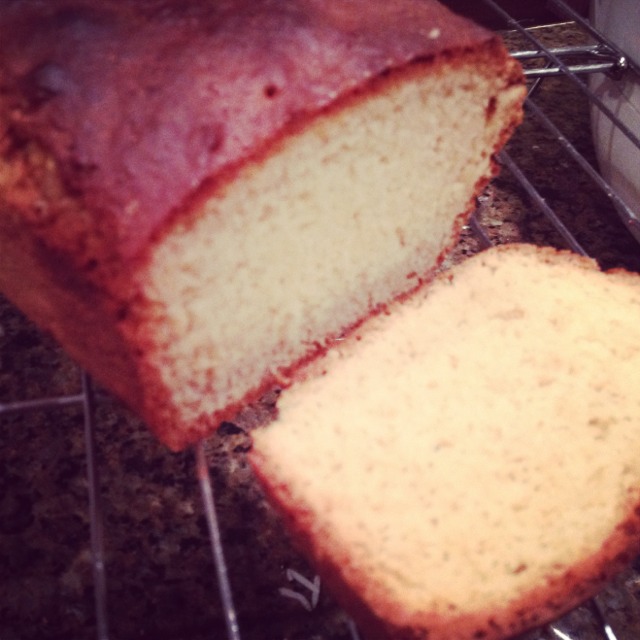
In December 2011 I found this post on the Glutenfree Goddess blog by Karina Allrich for Gluten Free Chocolate Gingerbread Cake. I made it twice over the holidays as it is delicious! About a week ago my wife mentioned that she would really like a moist Lemon Cake. So I wondered if I could turn the Chocolate Gingerbread Cake into a delicious Lemon Cake, and well this is it. I used most of Karina’s Recipe with some edits.

Gluten Free Lemon Cake

The easiest way I can think to document this cake is to display her recipe with my edits…

1 cup brown rice flour or sorghum flour
3/4 cup almond meal
1/2 cup cornstarch or potato starch- not potato flour
1 cup light brown sugar 1 cup organic cane sugar
1/3 cup unsweetened cocoa powder
2 teaspoons baking powder
3/4 teaspoon baking soda
1 teaspoon xanthan gum
2 teaspoons ground ginger
1 teaspoon ground cinnamon
3/4 teaspoon fine sea salt
1/2 teaspoon nutmeg or cardamon
2 large organic free-range eggs, beaten
1/2 cup unsulphured molasses
1/4 cup organic coconut oil-I actually used almost 1/3 cup Oil
4 tablespoons non-dairy milk 2 tablespoons of milk, non dairy
2 teaspoons bourbon vanilla extract
3/4 cup of fresh squeezed lemon juice-about 4 lemons
2 teaspoons lemon zest
3 tablespoons of honey

Read more: http://glutenfreegoddess.blogspot.com/2011/12/gluten-free-chocolate-gingerbread.html#ixzz1jVIRpALf

Combined all ingredients in a large bowl mixed with an electric mixer and placed in a ceramic baking pan lined with parchment paper and placed it in a pre-heated oven at 350 for about 60min per the recipe for the chocolate cake. At about 30 minutes I noticed the top getting quite brown, so I lowered the temp to 325 and allowed it to finish the 60 min and checked it with a toothpick to confirm it was done. I think next time I’ll use 325 for the 60 minutes.

And if you’re Gluten Free and not following Karina’s blog the Glutenfree Goddess, you are missing out! She’s a pioneer, inspiration and friend.

Cool Clouds-Photo a Day #14

Spent the afternoon outside kicking the soccer ball around and was out late enough to catch the clouds start to change color as the sun went down!

jan1-sky-clouds-L.jpg

Only edit were auto levels in Aperture and I removed a few dust spots.

Red Shirt-Photo a day #13

I was able to pick my daughter up from school today, which mean that we got to have a photo shoot! She loved her red shirt and wanted to keep it on even though it was her school uniform. I liked the bright red as well.

jan1-j4-red-shirt-L.jpg
ISO 1000 ƒ/2.8 T 1/800

I think this image is a good example of why some minor editing is helpful in digital photography. Here’s the saved jpg from the RAW file:

red-shirt-3-L.jpg

While this image is decently exposed with a histogram in range, a level adjustment and some minor sharpening in post help it out… There was plenty of daylight out but I was messing around shooting at 2.8 for the sake of experimentation. I didn’t realize how hard it was to get eyeballs in focus at 2.8 with a child that is in constant motion. smile So here are my initial edits in Aperture(Mac App Link):

red-shirt-1-L.jpg

I’m happy with these few edits, but I like to play with other tools as well and see what they do as well, so I added a few Effects in Perfect Photo Studio 6:

red-shirt-2-L.jpg

Hope everyone had a great Friday the 13th!

Cool Palm-Day 11 of Picture a Day 2012

So as my work day ended I raced outside to see if I could catch some clouds in the sky. Sadly there weren’t too many clouds in the sky, but I did find some cool light on this palm tree. I chose to use the TrueHDR app on my iPhone for most of the processing but i did use a little bit of Perfect Photo Studio for some subtle changes..

Here’s today’s photo:

jan1-palm-tree-hdr-L.jpg
ISO 125 ƒ/2.4 1/20 with iPhone 4S

Here’s the original file saved out the TrueHDR app:

palm-tree-hdr-2-L.jpg

So into OnOneSoftware’s Perfect Effects 3 for a couple of filters:

palm-tree-hdr-1-L.jpg

When I saved this file back to Aperture(Mac App Link), I noticed the sky was a bit noisy, so I decided to open the image up in Nik Software’s Dfine 2.0 to help reduce the noise in the sky. Over all i’m happy with this image, probably didn’t need to use the extra steps, but it’s fun to see how subtle the changes can be.

Cardinal Bear-Picture a day #10

Today was family picture a day. I asked the kids what I should take a picture of and the winning vote was the Albert Pujols Cardinal Build a Bear. Nobody in my household cares that Mr. Pujols is no longer a Cardinal, so it seems. My son started watching Albert during the World Series and time will tell if he is truly a Cardinal fan or will he come over to the other side and end up a Cub fan, only time will tell. His Dad and Grampy will make it difficult to be a Cardinal fan.

jan1-cardinal-bear-L.jpg
ISO 1000 ƒ/2.8 t 1/50 with a little off camera flash bounced into the ceiling

Here’s the original JPG from the saved RAW file:

cardinal-bear-1-L.jpg

Not a whole lot of edits needed but I dabbled a little anyways…

cardinal-bear-2-L.jpg

I ended up doing a little bit of cross processing which helped to bring out the details of his fur.

You don’t need anything fancy! It’s not about the Gear!

This post isn’t anything new it’s just common sense. Over and over again I hear friends claim they’ll get started when the new gear comes out or when they finally learn how to use the gear they already have. Mainly talking about photography gear, but it really could be any kind of gear. Running shoes, hiking boots, bicycles, etc., you get the idea.

I remember thinking, my camera isn’t good enough. If I could get a new camera that was easier to use i’d take more pictures. I should take a class. Ultimately, my desire for new gear wasn’t about the new gear, it was the warped thought that it would somehow magically create beautiful photographs without me.

The problem is that there is always new gear. Sure there are features about the latest gear that makes it easier but in the end it really doesn’t matter. What I’ve been amazed as I’ve embarked on year two of taking a photo a day is the wide diversity of what people use for their pictures of all skill levels. Some have great, expensive gear, many just use the gear they have on hand at that time. Maybe that’s a phone with a camera or a polaroid, not really, but you get the idea! Most of the time I never notice what equipment was used to capture the image, I notice things like composition, color, focus, textures and a slew of other things that have nothing to do with what was used to capture the image. My camera is over 5 years old, it has it’s quirks, but it still works for me and keeps me going. Photo communities are everywhere online today. Instagram, Google+(hint use the search bar to search for photography, or whatever), Smugmug(I love smugmug, use code:8v0X3g7f8J58s for $5 off), and Flickr are great places to find inspiration.

For the longest time I hesitated using portrait photography in my dental practice, because I didn’t have room for a portrait studio in my office. Honestly, it wasn’t the fact that I didn’t have room for a studio, it was fear of not knowing how to properly set up lights or use a flash or the correct background. Finally I decided it was time to forget about what I didn’t have or didn’t know and think about what gear and skills I already had. So I started to take portraits in my office. I still have lots to learn, but i’m learning along the way. As I’m learning I’m also learning about pieces of gear that are helpful along the way. Adding gear as necessary, not waiting until I have all the gear I think I need. Here’s a photo from a recent portrait photo shoot.

IMG7199-Version-3-L.jpg

So what are you going to start doing, I mean learning today? If you’ve already started what got you started?

Who’s Ready for a Banana? Picture a day #9

Today was one of those days, when you pull the memory card out of the reader and hit the delete key on every image take so far today because they was nothing worthy of showing anyone, let alone myself. Which is when I usually ask my kids for ideas. So here’s my son enjoying a banana. I had to do a little work in the post as this was initially poorly underexposed, mainly due to the poor lighting conditions in my dining room!  Here’s my photo for day #9

jan1-r6-banana-L.jpg

ISO 1000 ƒ/2.8 T 1/60

Here’s the saved JPG from the RAW file(yes, there is a little more wiggle room with a RAW file, but i’ve had this work equally as well using High JPG’s):

r6-banana-1-L.jpg

It’s just a bit dark, because of time I just used Aperture(Mac App Link) for the processing:

r6-banana-2-L.jpg

I adjusted the exposure so that the histogram was just touching the right hand side and played around with a few others tools as you can see in the screen shot above.

It’s a fun image and nice Monday save.