White Pocket at Sunset!

After a bit of delay, i’m back to posting photos from White Pocket!

And I just received notice that the On1 Summer Sale has been extended through Monday July 6, you can grab On1’s Perfect Photo Studio 9.5 for $79 with some fun add ons! Grab it here!

White Pocket is a place that many photographers may or may not have ever heard of. It’s in the Paria Canyon/Vermillion Cliffs area. The area is maintained by the Bureau of Land Management and not a National Park. There is a well run BLM office in Kanab, UT with quite a bit of info about the area. I’m hopeful to return soon!

This is a favorite from a recent trip! Love the “moon rocks”!

I edited this image in Adobe Lightroom CC, Adobe Photoshop CC and Perfect Photo Studio 9.5. The Dynamic Contrast Effect in Perfect Photo Effects 9.5 is turning into my favorite and “goto” effect to enhance textures! Grab the whole Suite for $79 with a few cool add ons thrown in as well while you can! It’s a steal!

Oh, I also just picked up an Apple Watch! Apple Watch posts coming soon!

Red Cut, White Pocket

White Pocket At Dawn

Canon 5D Mark III; ƒ/4; t/ 1/8s ISO:160


Sunrise at White Pocket, AZ is fantastic! White Pocket isn’t the easiest place to get to, it’s approximately 2.5 hours south east of Kanab, UT. The last two hours require a 4WD vehicle and depending on road conditions it can be challenging. Our plan was to drive to White Pocket midday on Friday and then spend the night to enjoy both sunset and sunrise. This is an image just as the sun was preparing to arrive for the day!

Edited this image in Adobe Ligthroom CC and Perfect Photo Studio 9.5 from On1 Software!

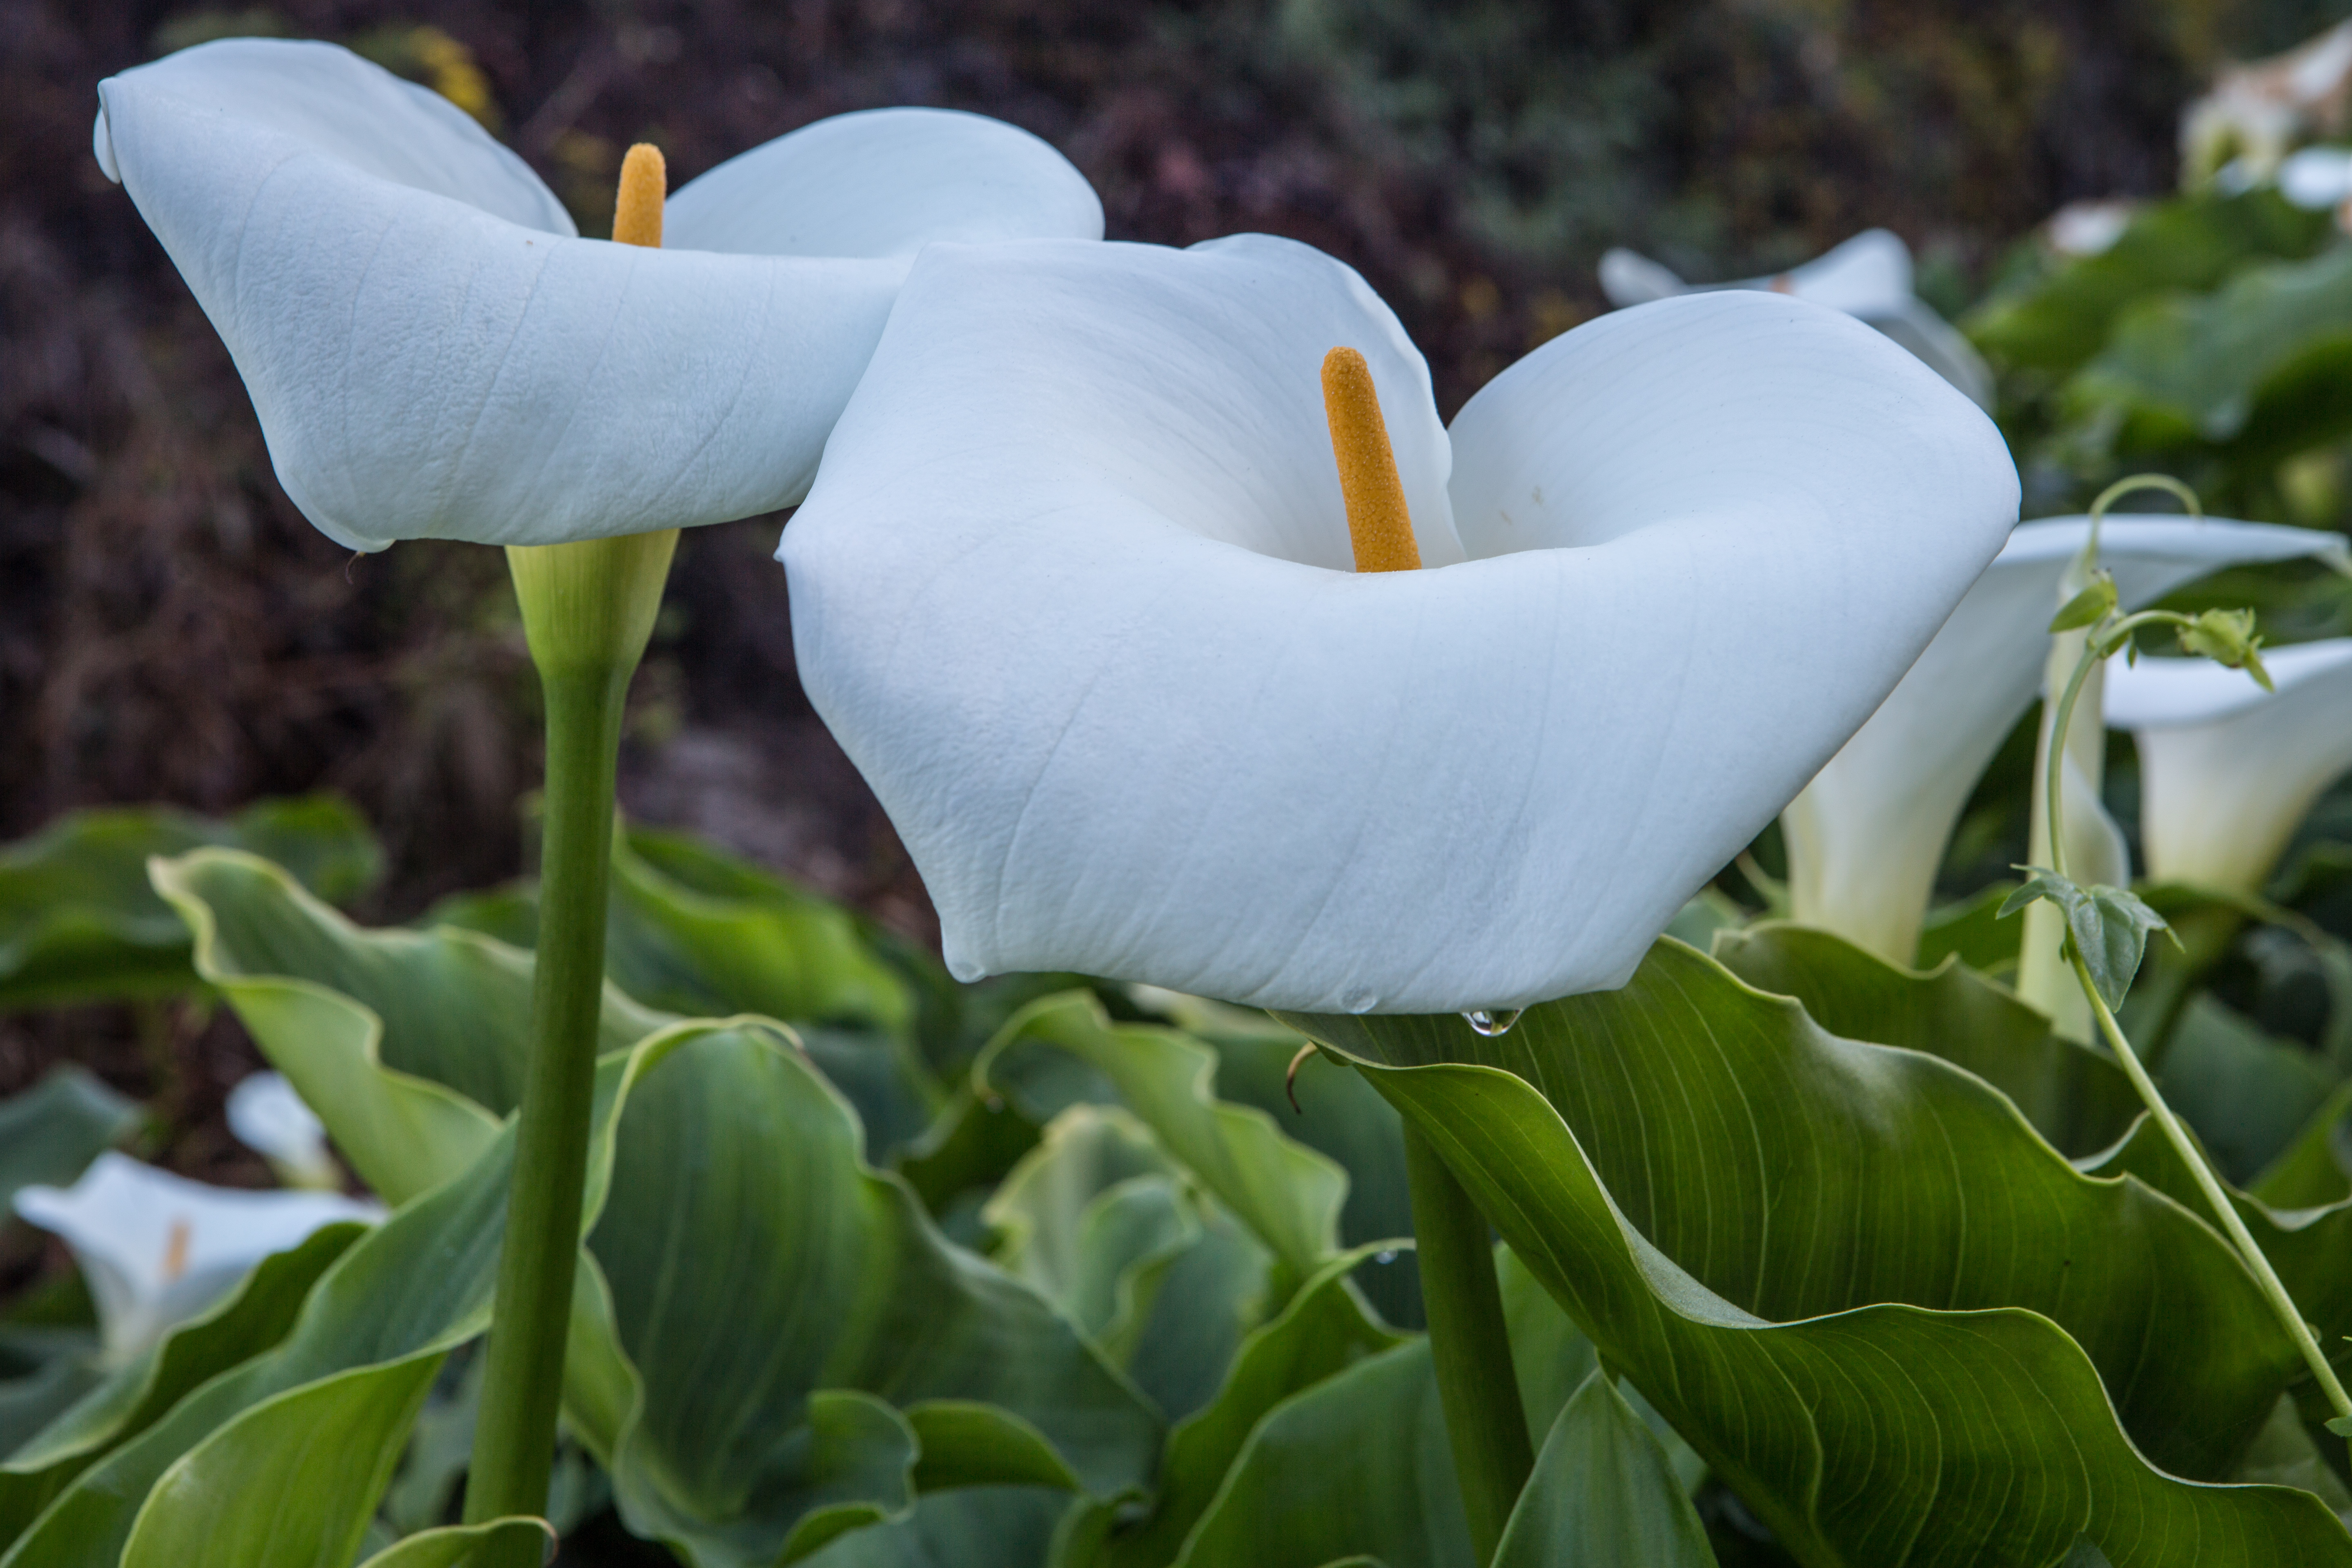
Calla Lilies in Big Sur

A quick update and photos of Calla Lilies

I just realized that I haven’t posted in over two months! Where has the time gone!

I was invited to join a cohort in The Arcanum. Im excited about the opportunity to grow my photographic arts via this medium! The Arcanum is approximately 2 years old now. I filled out a profile when they launched. As with most new ventures there are growing pains, so it took awhile for them to find enough Photographic Masters to meet the demand. I feel fortunate to have been picked by Les Saucier. He’s a fantastic photographer and so far a great mentor! I’m looking forward to this venture! The good news is that this project will encourage me to take more photos! Watch this space for new work!

OnOneSoftware is now On1 Software. On1 makes Perfect Photo Suite a collection of plugs and great tools to use either on it’s own or alongside Lightroom and Photoshop. Perfect Photo Suite has gone through a significant upgrade path over the past few years and On1 is ready to launch Perfect Photo Suite 9.5 soon. I use Perfect Photo Suite on most of my images. Definitely worth checking out if you haven’t.

In Big Sur calla lilies grow in the wild. I have never seen how or where Calla Lilies grow. These grow in a area where water from the hills filters down into drainage ditches and onto the beach and into the ocean.

They grow in wet muck! As you see their beauty you don’t really worry about the muck or the poison oak, but you try to avoid both! If you ever get to Big Sur go spend a few hours at Garapatta State Park and look for the Calla Lilies!


Picking the Right Time of Day

I think every photographer knows that taking pictures with the sun low on the horizon is better than when its right above. Recently I had the opportunity to capture a scene at Mid-Morning and at Sunset and the difference is striking!

Here’s Soberanes Point at Garrapatta State Beach mid morning captured with an iPhone image of the scene. We were on the way back from Julia Pfeiffer Burns State Park and it was a quick stop to check the beach out. It would have been easy to just take photos here at mid-morning and never come back.
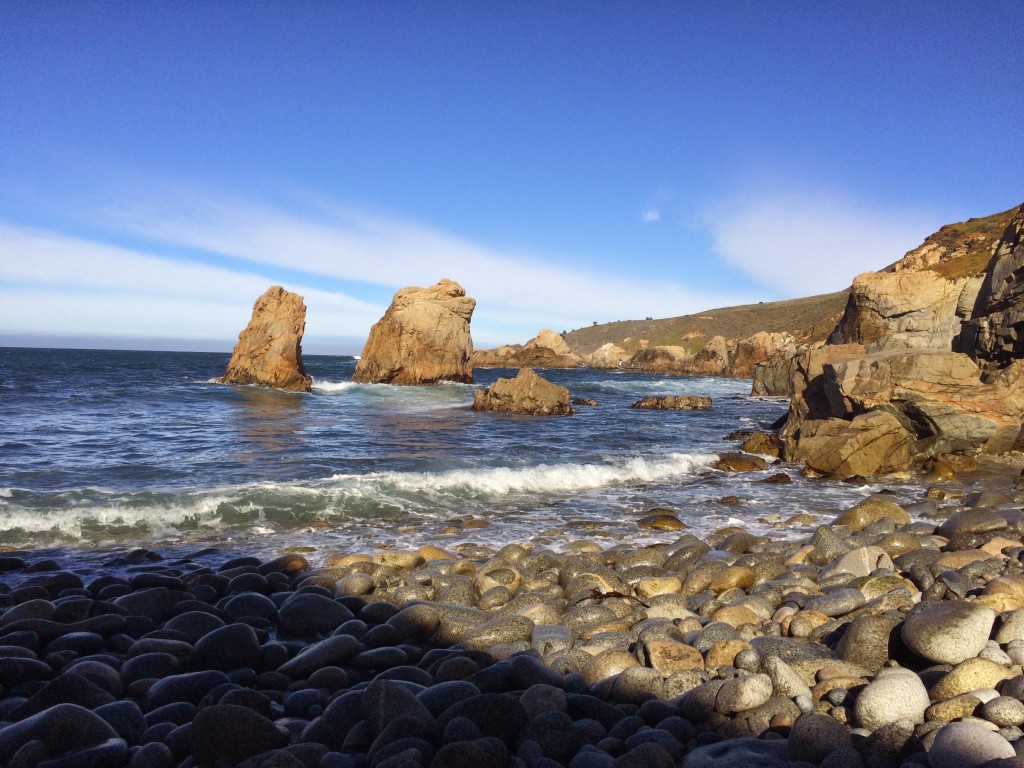
Mid Morning- iPhone 5s capture

Mid Morning- iPhone 5s capture

You can tell by the image that this is a beautiful spot. The two rocks in the surf, the boulders on the beach and the amazing coastline to the north. The only problem is the flat light. The sun is already to harsh.

Earlier in my photography learning curve I would try to make the best of the light and try to make a compelling image in any light. I have learned that unless you are in a studio or have access to a huge lighting/light blocking set up dealing with a high sun leads to flat and rather un-interesting pictures.

Here’s an image from the same spot(from our earlier stop we knew we wanted to work here during a sunset!), with the same iPhone 5s about 30 minutes before sunset.
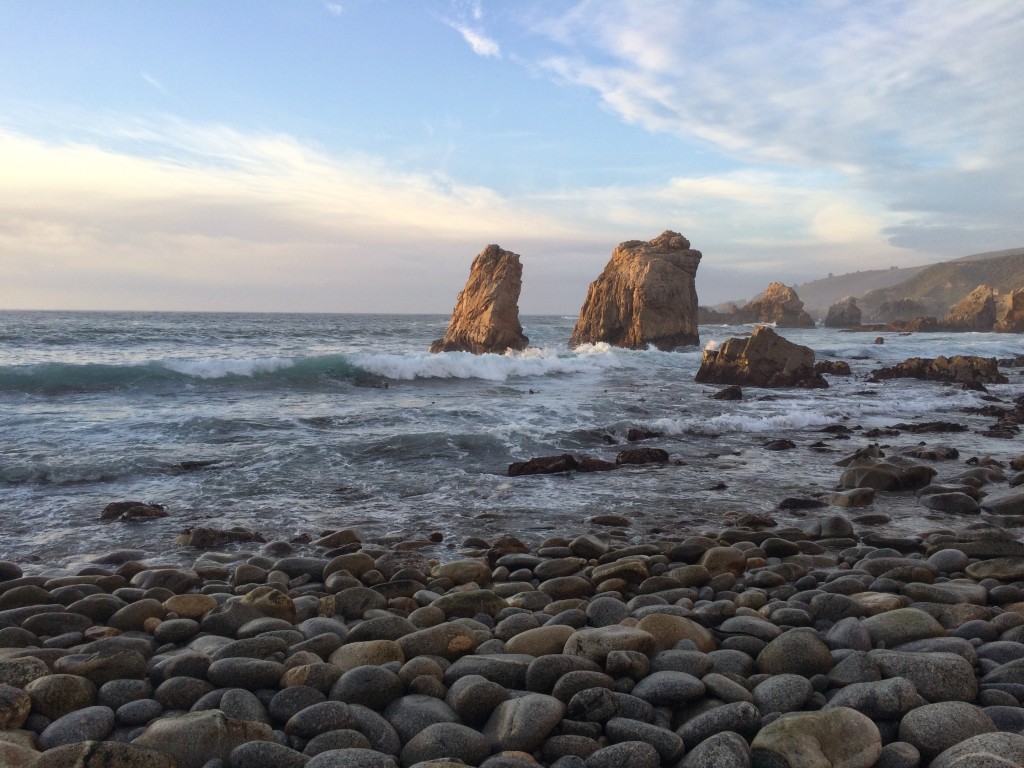
Captured with an iPhone 5S

Captured with an iPhone 5S

The golden hues really help to set off the two rocks in the surf. The image has more depth and straight out of my phone with no editing. I think I could improve it with a brief trip through Lightroom.

Getting the right light does take effort to drop everything to get to the spot before the light disappears and luck that the clouds and sky will cooperate.

When I’m traveling with family etc. its really difficult to drop everything and run to the sunset spot and if I try for a sunrise I’m usually spent for the rest of the day! Therefore when I travel with my family I try to make the best of the current light scenarios which leads to many photos in mid-day light.

Thankfully my family is more than happy to stay home and let me head out on occasion with a group of hard corp photographers and hunt the best light. Wake up well before dawn, and take off at 2pm to get into place as the sun starts to dip behind horizon.

I made this image about 40 minutes after the previous iPhone capture with my Canon 5D Mark III on a tripod

Yes the technique to capture this image would have been much harder with an iPhone, I probably could have gotten close had I used a tripod for my iPhone, but I couldn’t have made this image with mid morning sun.

Shooting landscapes is hard work… much harder than I ever imagined. Picking the right time of day requires planning and effort to get to the spot at the right time. It is rewarding when the effort pays off!

I guess that’s true for any endeavor in life.

You can view more images from my Big Sur trip at: http://www.sandquistphotography.com/Collections/BigSur/

Gluten Free Pizza at Pizza Hut!

Pizza Hut is rolling out Gluten Free Pizzas(https://order.pizzahut.com/glutenfree) with Udi’s Crusts in cooperation with  Gluten Intolerance Group’s(GIG) Gluten-Free Food Service Training & Management Certification Program (GFFS).

Erica over at Celiacandthebeast.com has the a fun write up!

Sounds like Pizza Hut is trying to roll this out with reasonable safeguards against cross contamination. That said contamination is still an issue, the restaurants are small, lots of people have the opportunity to mess up just once and there may be some that are still to sensitive to give it a try.

We’ll probably give it a try when they arrive in our area as sometimes it’s fun to just order a pizza!

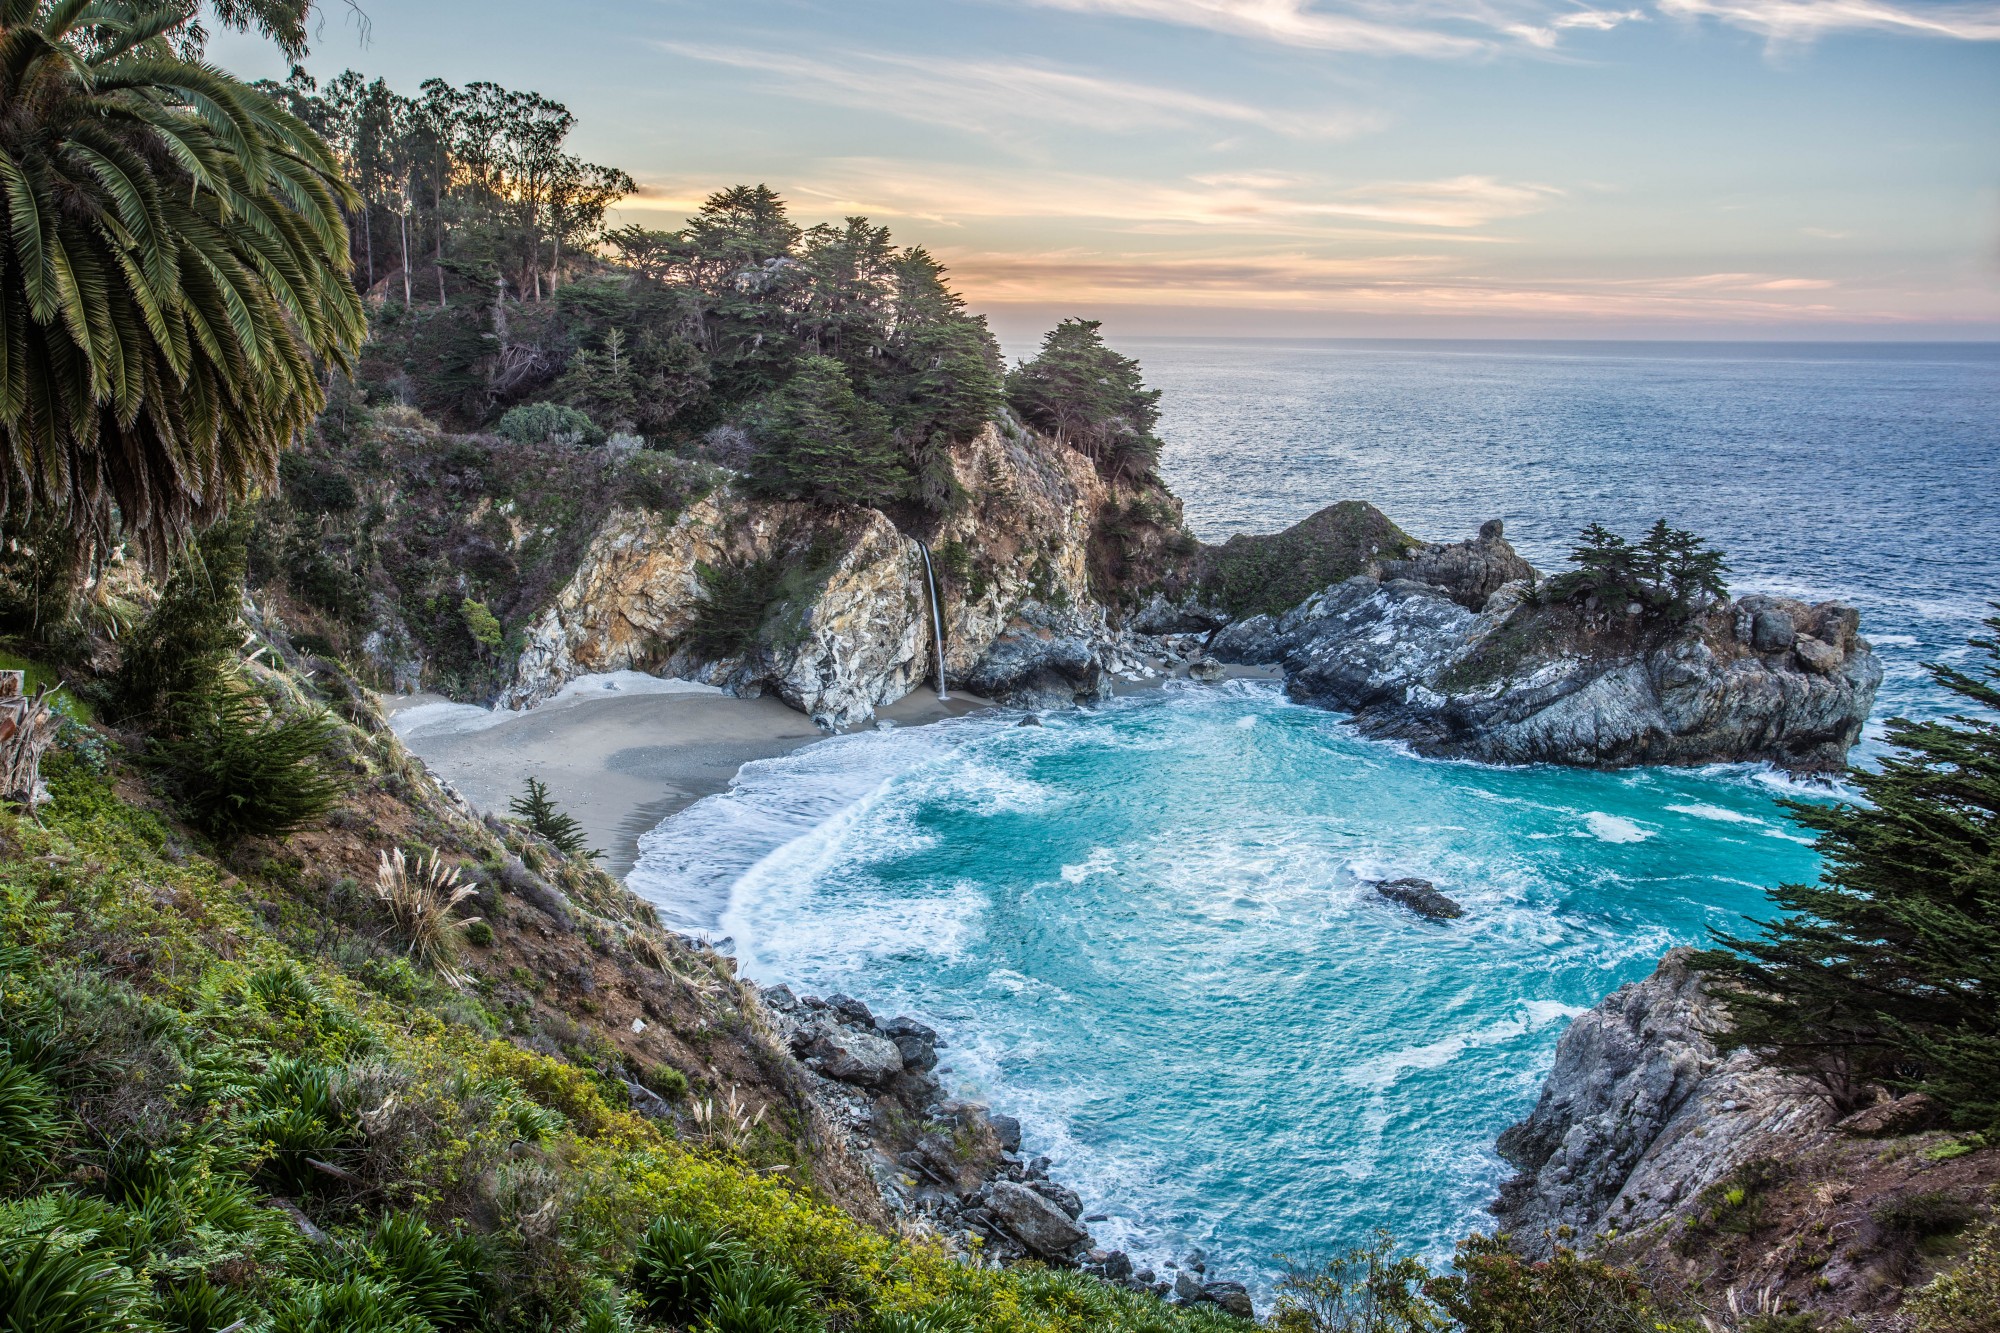
McWay Falls at Julia Pfeiffer Burns State Park

Getting to this fantastic beach before sunrise requires a fun ride down California Highway 1 in the pitch dark! I had no idea how close we were to the massive cliffs over the Pacific Ocean! I’m glad I didn’t know as we were in a hurry to get to Julia Pfeiffer Burns State park and McWay Falls! According to the Wiki on Julia Pfeiffer Burns State Park , the property was owned from 1924 by US Representative Lathrop Brown who built one of he first electrified homes on this part of the coast and then dedicated the property to Julia Pfeiffer Burns as a donation to the State of California in 1961 and the home was torn down as part of the gift. Remnants of the home can still be seen right behind where i’m standing.

This photo was taken just as the sun starting to appear on the horizon to the left. There is evidence of a landslide into the cove a few few years back but it didn’t really take away from the beauty of this location! 

Purchase this Print 

One of the reasons for getting there before sunrise was to try and capture a few stars over McWay falls.

Purchase this Print

I was pleased with this capture and happened to get the Orion over the falls!

Both images edited in Adobe Photoshop CS2014 and OnOneSoftware Perfect Photo Studio 9

I also have a gallery of Big Sur photos  at Sandquistphotography.com with Print purchases available.


Sunbeam at Pfeiffer Rock-Big Sur, CA

Updated with 2 new photos from Pfeiffer Rock

Spent an incredible afternoon/evening at Pfeiffer Rock and watched the sun set through the key hole in the rock! This is a blend of 3 exposures in Adobe Photoshop and finished with Perfect Photo Effects 9. Click on the photo to see it bigger!

If you ever get a chance to head to Pfeiffer Rock in Big Sur during the winter time, Go!

I began the year with a text from my sister, Wendy Retzer asking if I wanted to participate in John Acuff’s 10-Day Do Over Challenge. Having not heard of the challenge I asked for more information, looked it over and decided to give it ago. So far it’s been a fun, thoughtful challenge! If you’re ready for a DoOver I’d recommend giving it ago!

Day 5 is spending a few minutes to identify what motivates you! I discovered that Learning Motivates me and today I felt motivated to learn something.

Photos get better through editing. Great photos get better and bad photos can often become “not so” bad photos. One editing tool that I often use is Perfect Photo Studio from OnOneSoftware(It can be used as a stand alone app or as a plug in to Adobe Lightroom and Photoshop). Specifically the Perfect Effects portion of the suite. There are two tools that I have struggled to figure out when and where to use them.

Dynamic Contrast and Tonal Contrast.

Dynamic Contrast has its own group of separate effects and the Tonal Contrast effect is inside the Tone Enhancer group of effects.

Here’s an out of the camera image on a gray cloudy day at Disney’s California Adventure:

Straight of the of Camera: Canon EOS 5D Mark III ISO 400 Focal Length 25mm Aperture f/4.5 Exposure Time 0.0002s (1/4000)

First edit in Adobe Lightroom 5:

Lightroom 5 Edits: Exp: +.25; Contrast: +27; Highlights: -100; Shadows: +50; White: +10; Black: -27; Clarity: +63; Vibrance: +36

Dynamic Contrast Filter Added in Perfect Photo Effects 9:

Dynamic Contrast-Normal

Tonal Contrast Filter from Perfect Photo Effects 9:

Tonal Contrast Filter Added

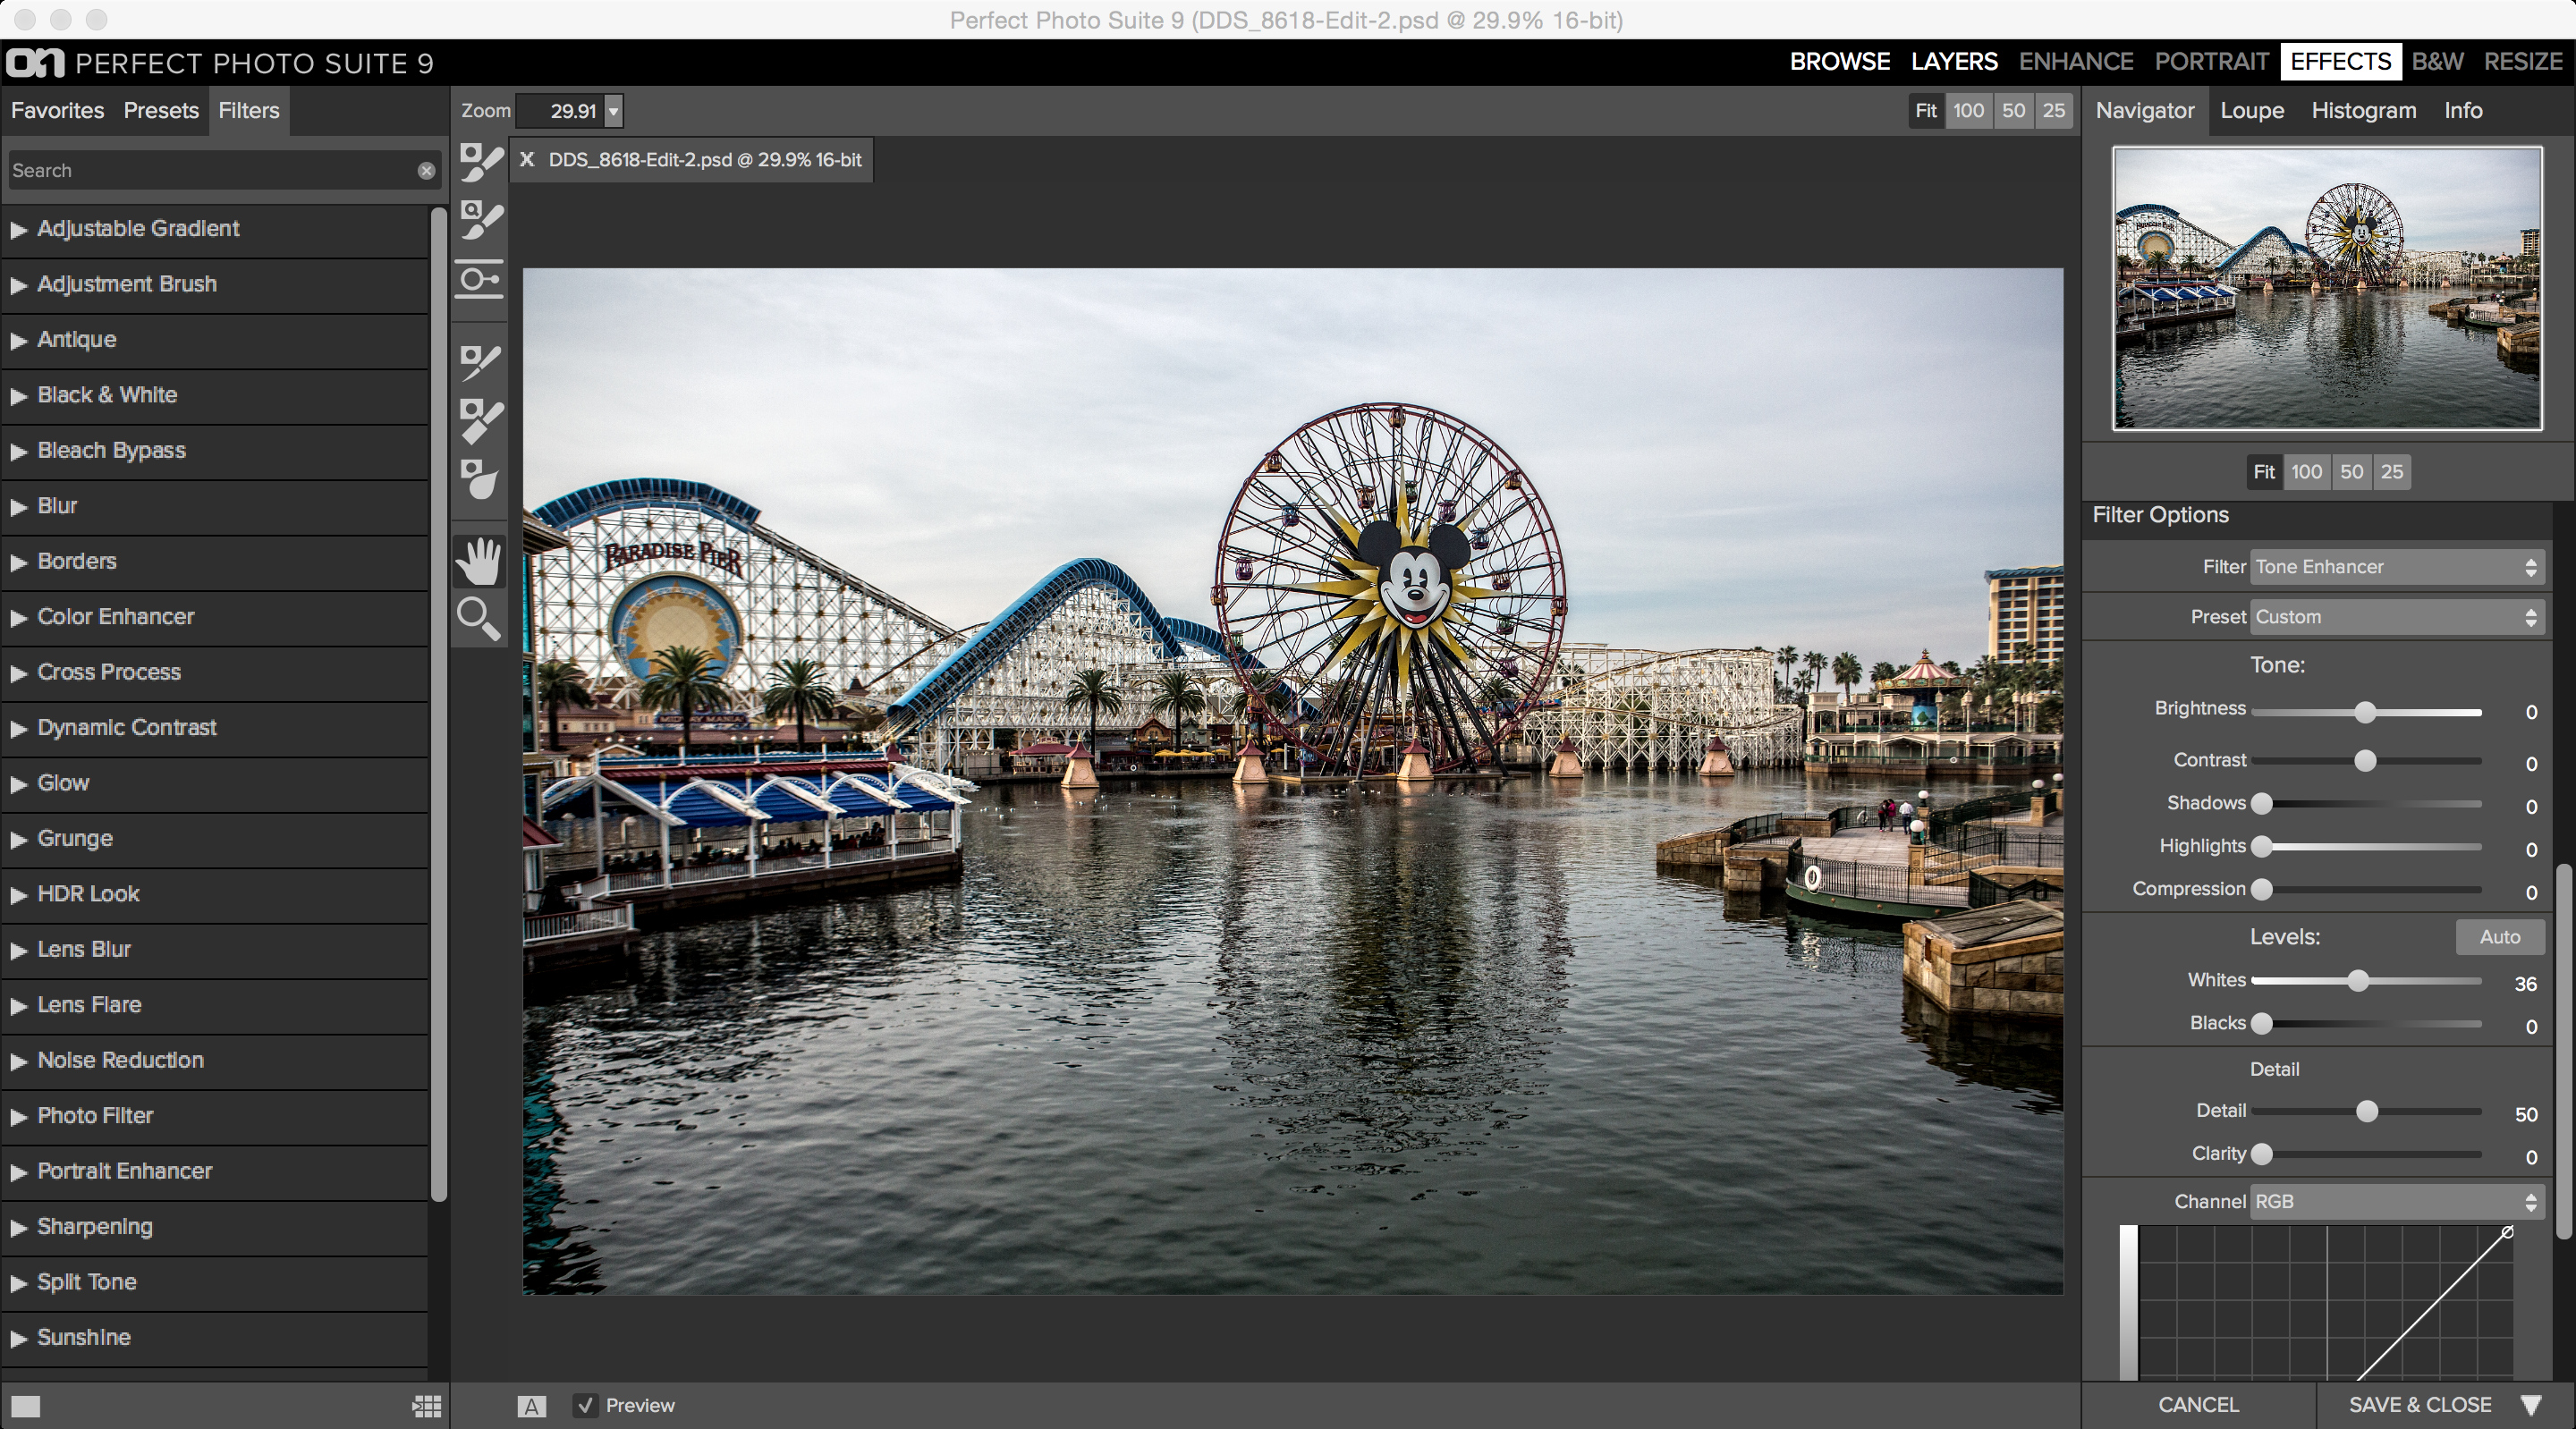
Screenshot from Perfect Photo Effects 9:

Screenshot showing the tools available to fine tune the Dynamic Contrast tool

Screenshot of the Tonal Contrast tool:

Tonal Contrast Options

This exercise is less about which image looks better and more about how the tools work. I’ve discovered that the Tonal Contrast filter gives me more options to fine tune the image in terms of darkness and lightness of the image. Dynamic Contrast appears to work in a slightly different way in that it works on the whole color range of the histogram. But i’m not entirely sure right now… I do feel it was easier to brighten up the image and keep the cloud detail with the Tonal Contrast tool. My thought process going forward is use Dynamic Contrast when I want to sharpen up the whole image and am satisfied with the overall  exposure. Use Tonal Contrast when I want may need to also enhance the exposure a bit as well.

As I was looking for info about these two tools I found this quick video from Matt K talking about using the Dynamic Contrast tool and when not to use it in Perfect Photo Effects. Be careful using these tools on People!

I do use Perfect Photo Studio 9 for most of my images and I do receive a small referral fee should you choose to give it a try using any of the links on this page. Just click here to give it a try!


Yes, Happy New Year Intentions!

As the new year begins I think is good to step back and also consider what worked and didn’t work last year. I’m not a fan of goal or resolution setting. Once I know the goal or resolution won’t be achieved I give up. I think that makes me normal! This year I was again pondering the Goal/Resolution thing and ran across this post by non other than Tony Horton, of P90x fame! He wrote this article called Skip the resolutions and Create Intentions.

The idea of Intentions clicked! I create intentions!

I intend to do…

Last year one of my intentions was to improve my photography. Part of getting good images is getting to places that are interesting to photograph!

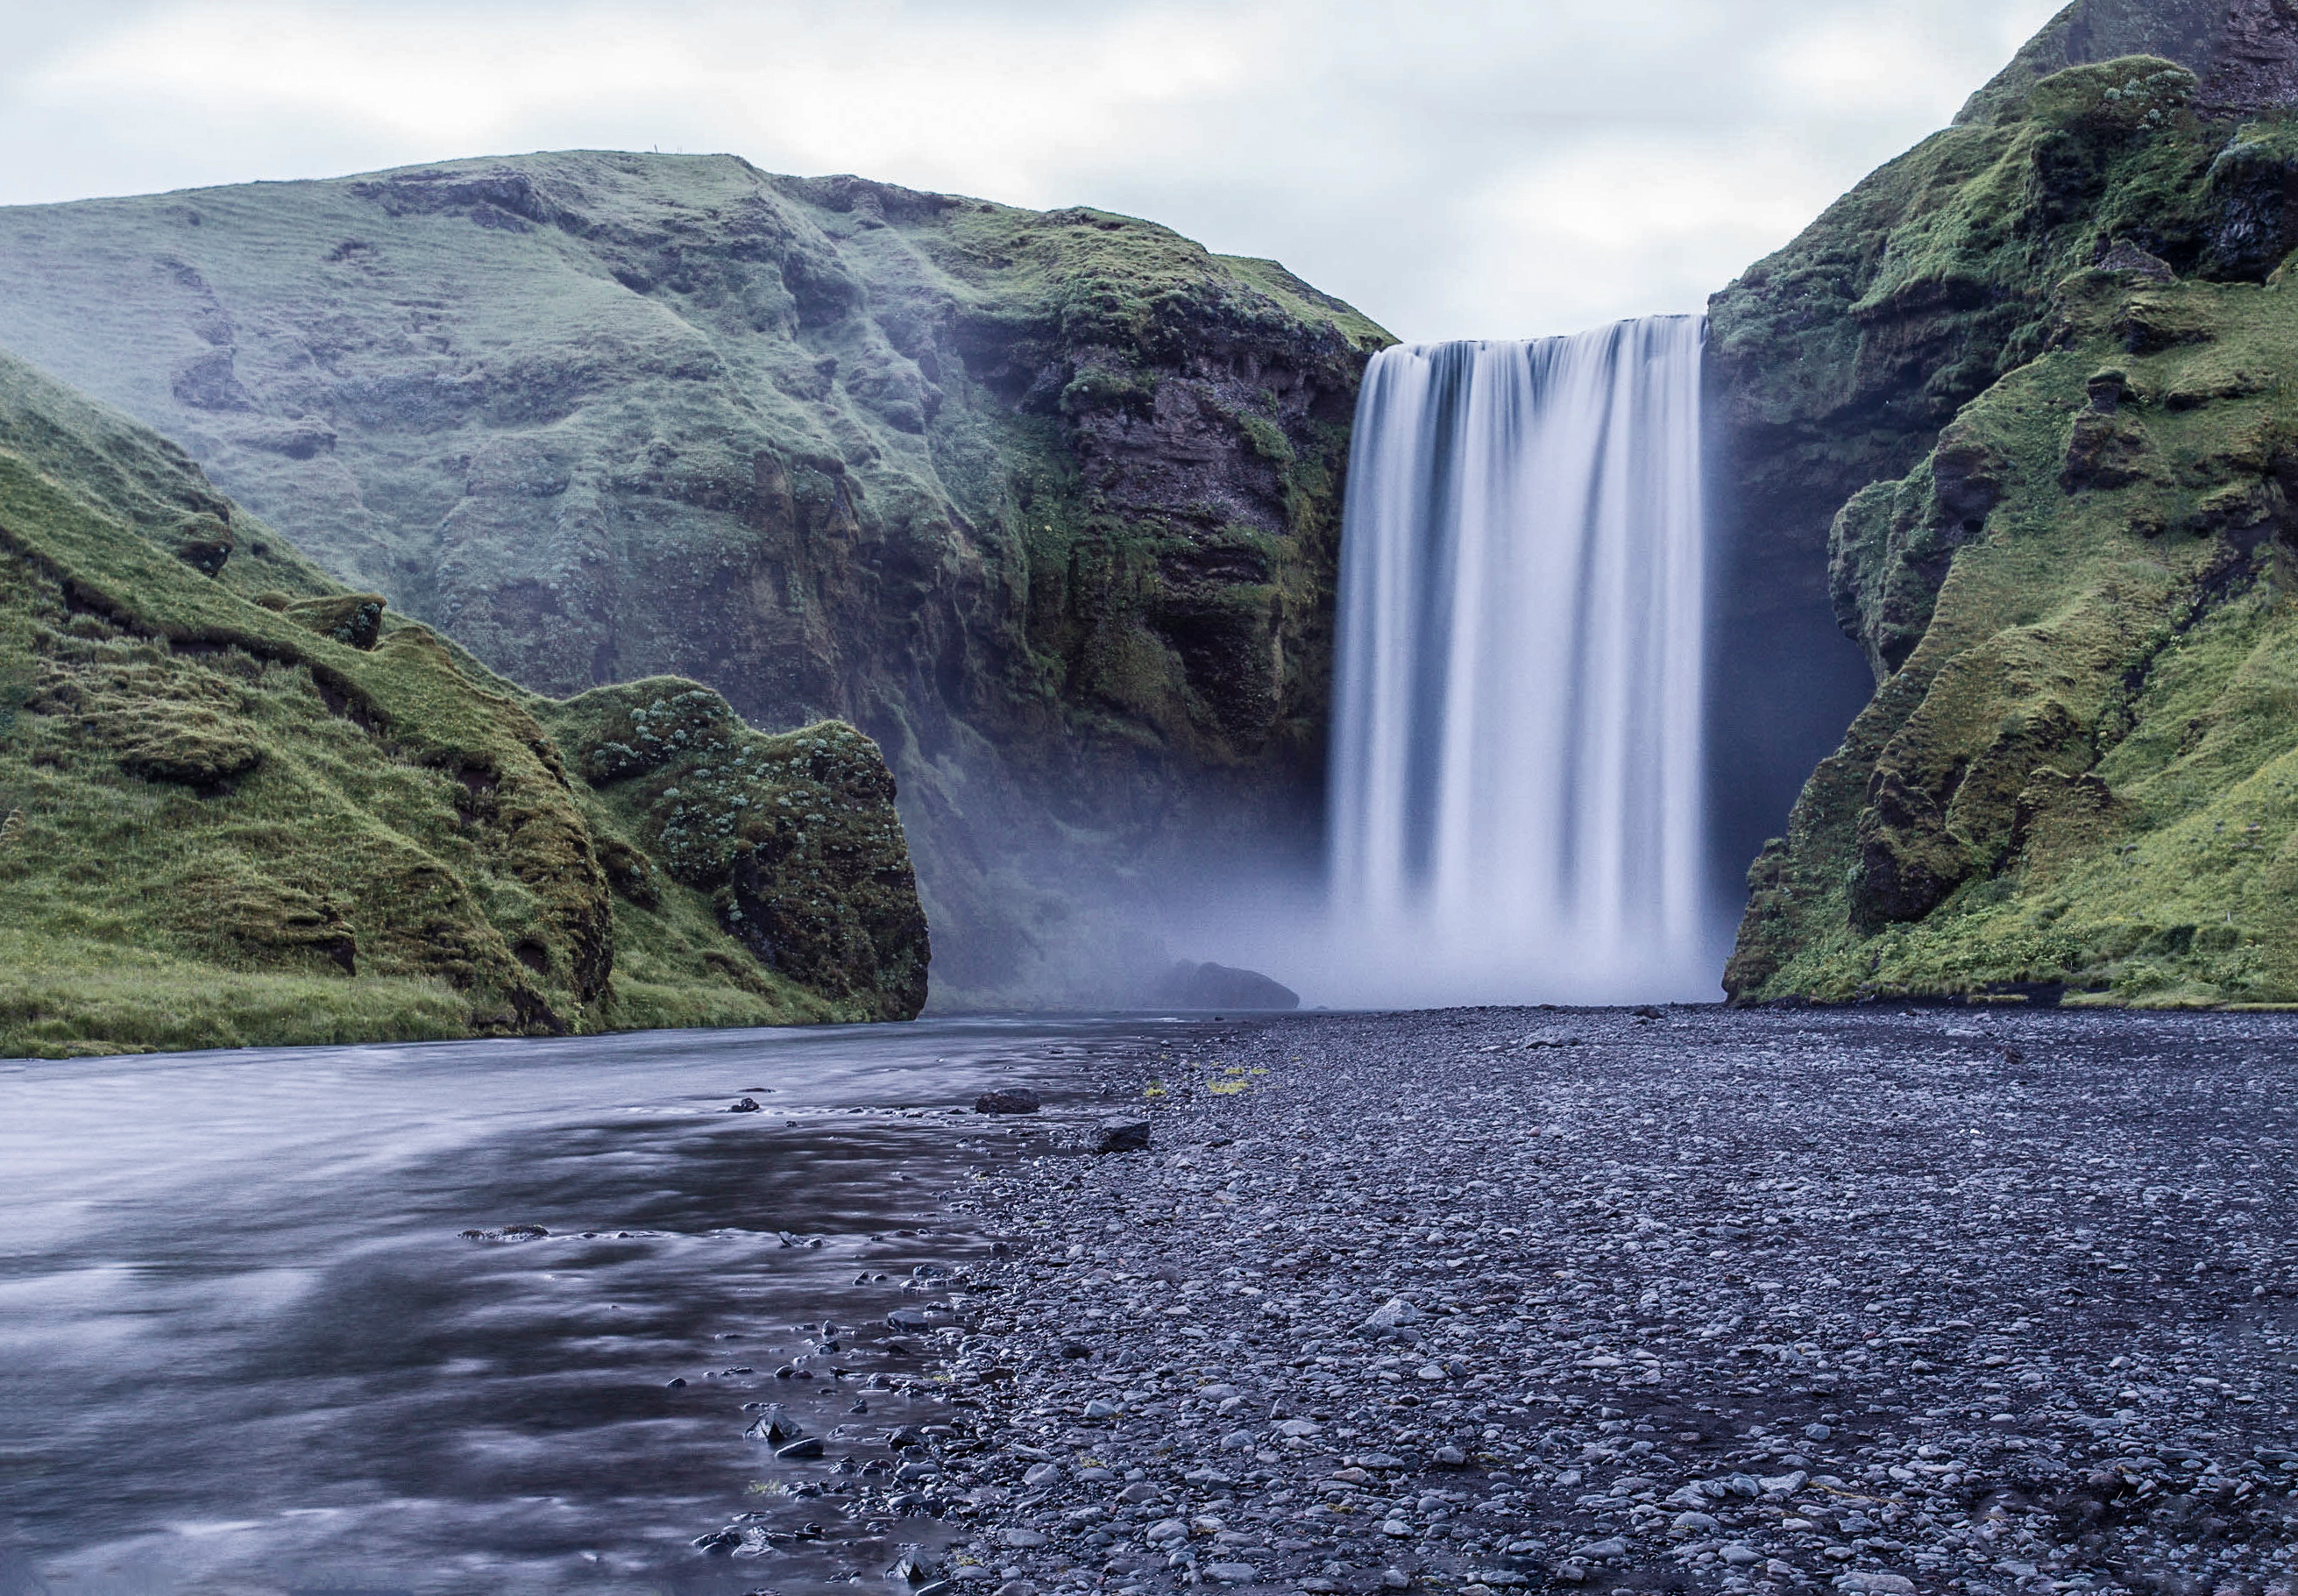
At the virtual last moment(Ok, I had a few months to plan, but really only had a few days from hearing about it to going)  I was invited to join a photo trip to Iceland. Since I first saw images from Iceland over 10 years ago, I just knew I had to go… So I did. (Just had to share a few favorites that I don’t think i’ve shared here)


Skogafoss-Edited in Adobe Lightroom 5 and Perfect Photo Studio from OnOneSoftware


Glow over the Glacial Lagoon-Edited in Adobe Lightroom 5 and OnOneSoftware Perfect Photo Studio 9

So in 2015:

I intend to continue to improve my photography skills!

I intend to improve my physical health!

I intend to improve my professional skills!

I intend to continue to build beneficial relationships!

I reserve the right to add intentions at anytime!

I will have a great time with my family!

Happy New Year!

Re-Sizing images,BIGGER, sometimes it’s the only option!

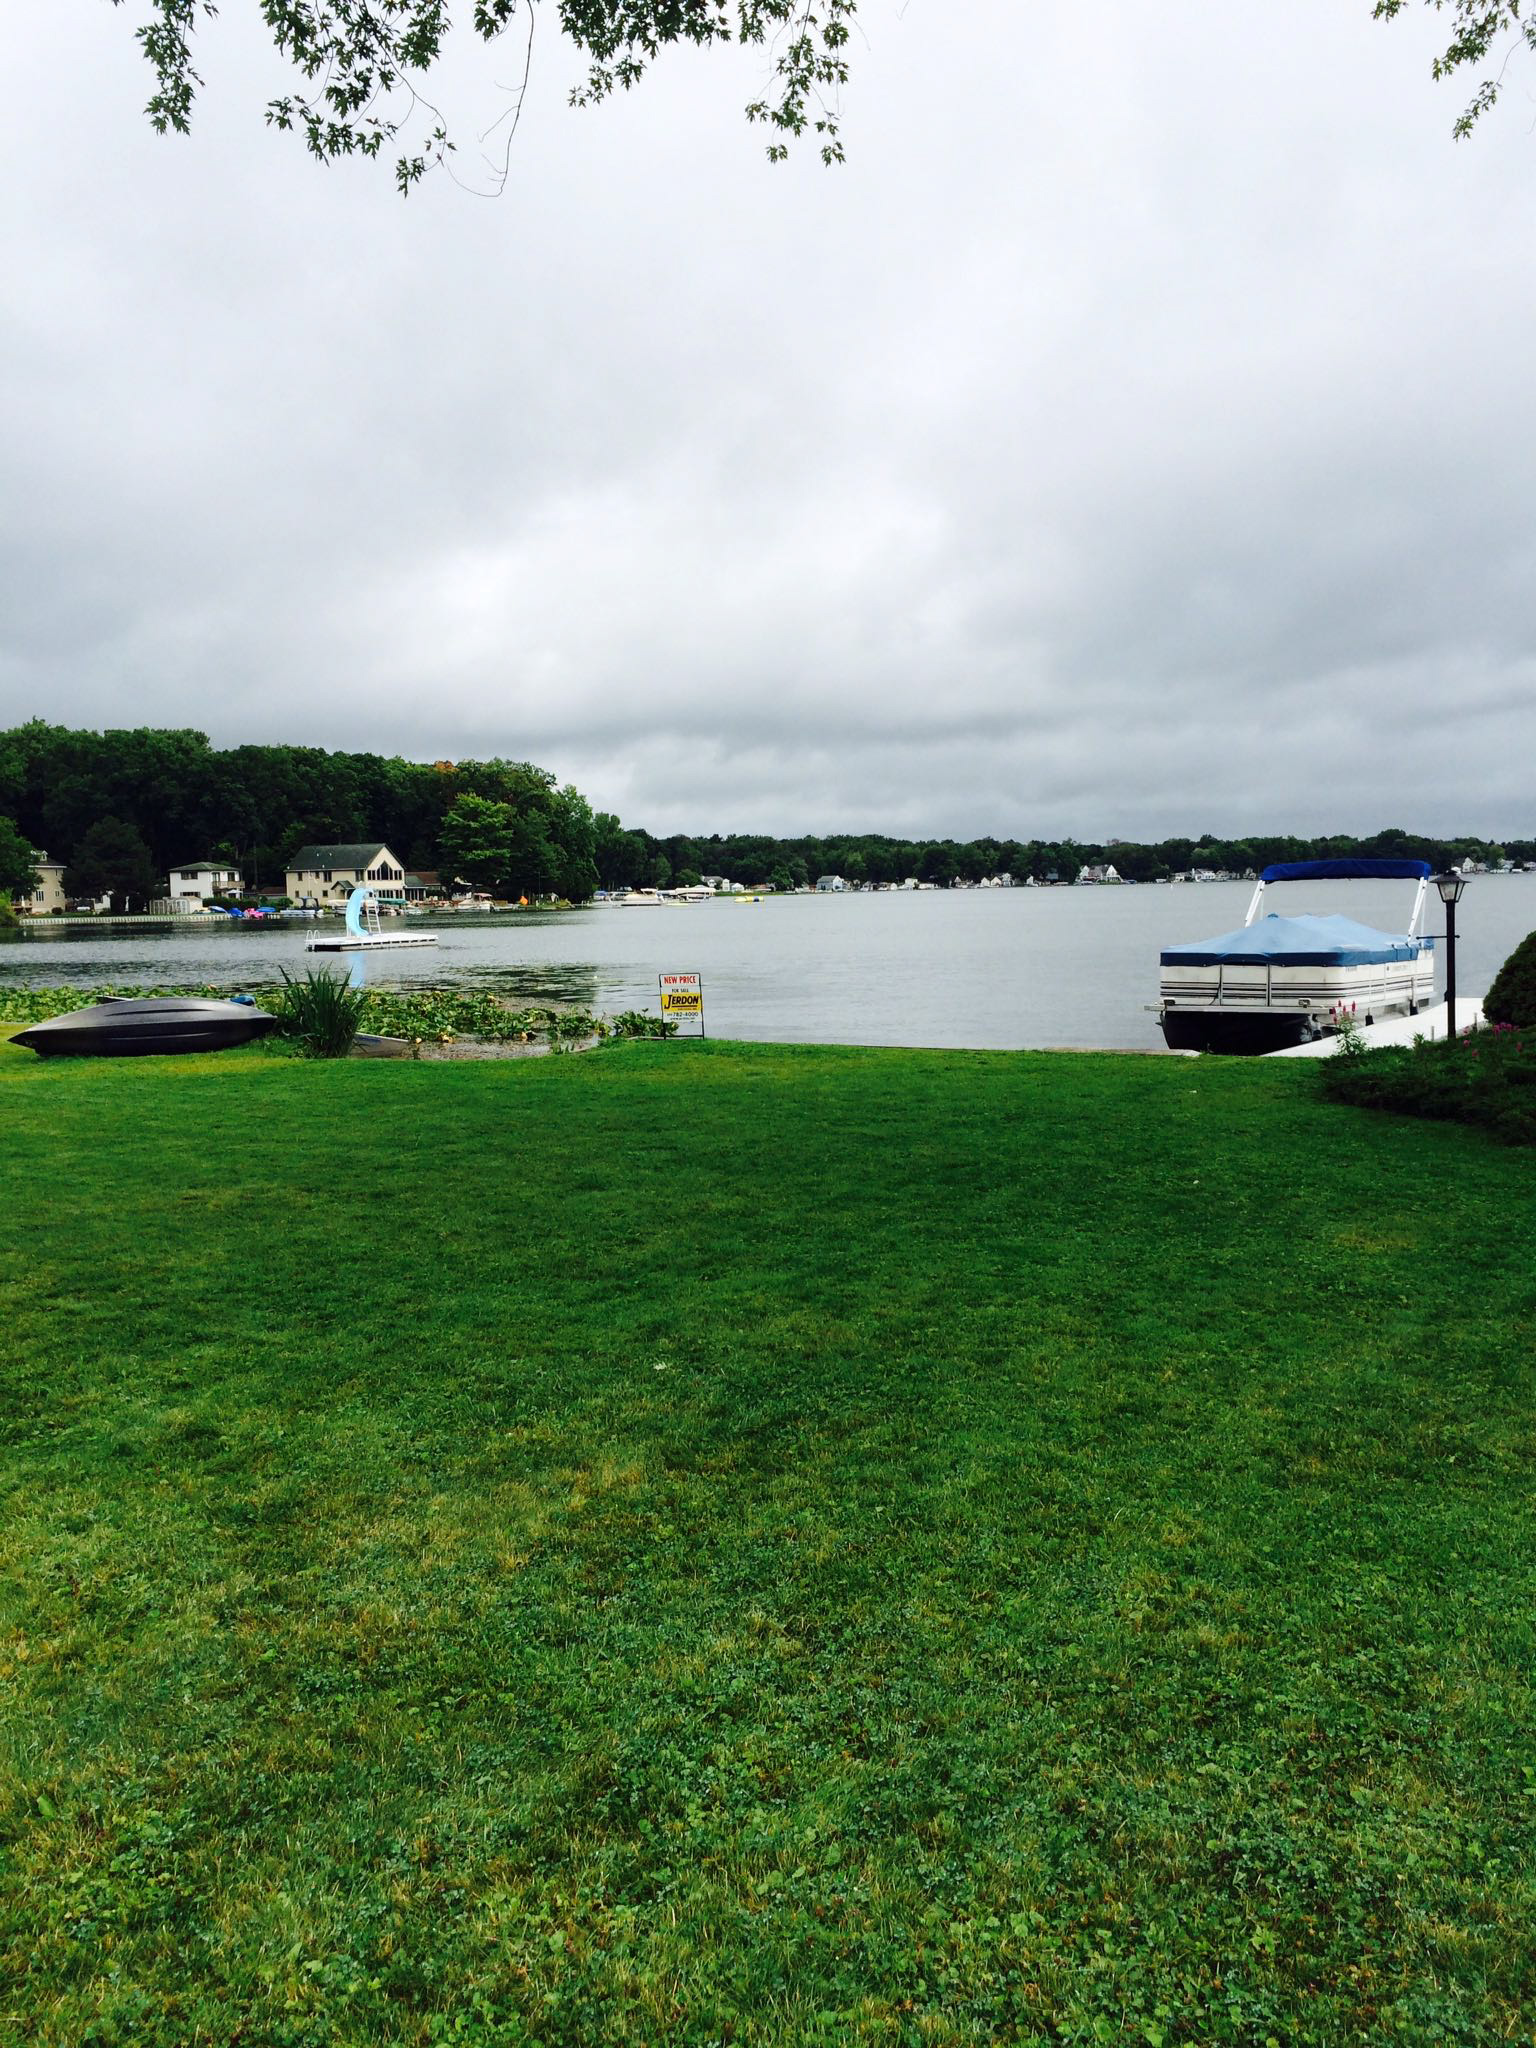
On occasion the camera or iPhone isn’t set to save the highest resolution images. This often isn’t a problem until you go to print or make a book for Mom! I recently created a Blurb book and found a few images that received a warning from Blurb that the images may not print well. Do to the nature of the images, I could have easily made them smaller and included them with other images, but I wanted to test out Perfect Resize 9 from OnOneSoftware. This is an application that uses math to build more pixels! The image on the left below is the original out of an iPhone 5S(1536×2048) and the image on the right has been resized to 16X20(4800×6000) image in Perfect Resize 9. If you click on the images you can evaluate the original images in your browser.


Image Resized with Perfect Resize 9 to 4800×6000


Original iPhone 5S image(1536 x 2048)

What’s great about Perfect Resize 9 is that you have the option to resize up to an appropriate print size. Most digital cameras shoot at 2×3 aspect ratio. Sometimes you want to print at 4×5. Instead of cropping and losing pixels, with Perfect Resize 9 you can upsize to 4×5. Obviously there are limits and images that won’t upsize well, but for many images that are composed well and lit well the software does an amazing job!

Perfect Resize 9 is part of the Perfect Photo Studio 9 and can be purchased separately or bundled in the studio version!