Golden Gate Glow

Winter in California means rain. In fact, the state just had its first rain of the new season over the previous two days. But the weather forecast suggested there might be an opening in the clouds —and an opening for me to get out to this location well before dawn.

I pulled myself out of bed and made my way to the iconic Golden Gate Bridge, excited to capture the sunrise. One thing I hadn’t counted on? A thick soup of fog. I could barely make out the glow of the bridge’s steel trusses, and I had no idea whether or not the fog would lift. Fog or no fog, I decided to stick around to watch the sunrise anyway. I was rewarded with a spectacular morning show. As the sun rose, the fog receded, slowly unveiling the bridge and some glimmering clouds, too.

Purchase a Print of Golden Gate Glow
San Francisco’s iconic Golden Gate Bridge stretches through the fog. 
(Purchase this Print)

I’ve captured many of my favorite images simply by showing up and sticking around. Whether or not I end up with the shot I wanted, I always enjoy watching nature do its unpredictable, mysterious, beautiful thing.

Check out my California Fine Art Gallery for more images of The Golden State

Mesquite Sand Dunes Sunrise!

Sunstar over Death Valley

Sometimes you have to be an early riser to catch a landscape in its most pristine state. For this shot of the Mesquite Flat Sand Dunes, I arrived in Death Valley National Park at 5:30 a.m. Wearing my trusty headlamp, I began my hike in. (You’d be amazed at how dark the dunes can be on a moonless night/early morning!)

Because footprints tend to destroy the amazing lines that Mother Nature draws across the dunes, I wanted to find an area

The Mesquite Flat Sand Dunes are located about two miles from Stove Pipe Wells, California in Death Valley National Park. View Print Options for Death Valley Sunrise


that had yet to be explored that day. I staked out a spot and waited for the sun’s first rays to peek over the horizon. Although I was hoping for a few clouds to mix with the morning light, the sky was mostly clear.

Sunrise highlighted the dunes’ delicate, crisp lines which always seem to be in a state of flux. As the wind blows and changes direction, the look of the dunes changes along with them. And any footsteps—including mine—are soon blown over and forgotten.

Anitas in Reine Norway

Reine, Norway

You can nearly smell the briny waters of the Norwegian Sea’s Vestfjord—literally “the West fjord”—in this brisk scene. I shot it in the remote fishing village of Reine in Norway’s Nordland region.

And just behind me? Anita’s Seafood (https://www.facebook.com/anitasseafood/), a  restaurant and fish market serving both fresh-caught fish and dried cod. Arctic cod spawn in these waters during winter, but, by summer, they’ve moved along. So, villagers have taken to preserving their cod. At Anita’s, they re-hydrate dried cod over a seven-day period and then serve.

For more Norway pics check out my 2018 Norway Gallery

Northern Lights of Norway!

Finally got to see the Northern Lights!

Seeing—and photographing!—the Northern Lights has long been on my bucket list. So, from transportation, accommodations, and all the usual travel details, I had planned as much as I could several months in advance for my recent trip to Lofoten, Norway. Still, there was one thing which was decidedly out of my hands —the weather.

Click on the image below for print info! 

Utakliev Beach, Lofoten Norway

A very active Aurora Borealis above Utakliev Beach in Lofoten, Norway.

During the middle of winter, the Northern Lights (also known as the Aurora Borealis) are stunning in that part of the world. But, if I reached Lofoten during a cloudy stretch, I wouldn’t be able to see a thing. All I could do was eye the weather reports and hope for a few clear nights.

On my very first night in Lofoten, darkness fell, revealing clear skies and a very small Aurora Borealis. Sadly, the next seven nights were cloudy and alternately filled with rain or snow. It seemed as if I would be “skunked” this time around. But on the very last evening? Success! The skies cleared and erupted in breathtaking green. The Aurora Borealis was still active by the time I reached Utakliev Beach, and I was able to capture “Norway’s Northern Lights.”

More images from my 2018 Norway trip can be found in this gallery!

Hamnøy Village

It took four separate (and lengthy!) airplane trips and another one-hour ride by car to get to what feels like the end of the earth. But all that travel—and braving the elements above the Arctic Circle—was well worth it. This is winter in Hamnøy Village, located at the far west end of Norway’s Lofoten Islands.

Hamnøy Village, on Norway’s Lofoten Islands, feels as remote as the end of the world. With the everchanging weather, quaint cabins, and soaring mountains, it’s a photographer’s playground.

The island itself is so small that Hamnøy’s little, red cabins—where we stayed for a few days—are build right over the water. When I captured this image, we had watched a beautiful sunrise here and then a wintry mix of clouds, high winds, and snow rolled through. I used a four-minute exposure to highlight the water’s silky texture.

For Hamnøy Village Print options head on over to my print site here.

Tips to Take Striking Photos of Holiday Lighting

Q: “How can I take striking photos of Christmas tree lights and other kinds of holiday lighting?”

A: Christmas tree lights, as well as other kinds of holiday lighting, are fun to photograph. And creating really striking images of these is a lot easier than you might think! You may have seen what’s known as the “bokeh” effect—when certain parts of an image are deliberately out-of-focus—used in professional portraiture and cinematography. Bokeh is based on a Japanese word that means “blur.”

The best way to achieve this effect is to experiment, practice, and have fun along the way. Here are a few ideas to try, along with examples of my own shots when I tried each of these myself. 

Shoot Holiday Lights completely out of focus!


1. Shoot the lights completely out of focus.

This one is really simple. Just turn off the “auto-focus” feature on your camera, if you have one, and shoot away at any level of focus that you like. The more out-of-focus the image is, the more pronounced the bokeh effect will be.


Turn the zoom ring while taking the picture

2. Using a zoom lens, move the zoom barrel while simultaneously exposing the shutter.


Again, the lens is out-of-focus, and the aperture will be fairly small. Try setting your ƒ/number to ƒ/18 and shooting at 1/10 of a second. Then, start moving the zoom ring back and forth. Press the shutter until you get an image you are happy with.

Use creative depth of field

3. Use the blurred lights in the background.

This technique can also be used for interesting portrait photography. (See the next example for that.) In order for this to work, you need a shallow depth of field.

A shallow depth of field is accomplished using a wide aperture. (That means you’ll use a small ƒ/number like ƒ/4.0 or ƒ/2.8.) Once you have a wide aperture selected, you will then want to focus on an object that is in front of the lights and focus on that. In the image of the ornament on the Christmas tree, I placed my focus on the ornament itself. It was positioned in front of the tree’s lights enough that they produce that blurry bokeh look.

If you want to take a portrait in front of the tree, you’ll use the same technique as with the ornament on the Christmas tree—with one caveat. If you set your camera up to create a bokeh effect, you will have to add light to your subject. This is called “fill flash.” Many DSLR cameras have the ability to add flash automatically. The image of my daughter was taken at ƒ/2.8, t 1/180, and I used a fill flash on her. (You don’t have to settle for your camera’s flash though. You can use any light source that looks pleasing to you!)

Gold Rush on McGee Creek

Aspen aglow over McGee Creek

Early last month, some photographers friends, my son, and I met up near Mammoth Lakes, California in the Eastern Sierra Mountains. Just after sunrise, we ventured over to nearby McGee Creek just in time to catch the aspen trees, glowing neon-yellow, in the morning light.

McGee Creek Gold Rush

Yellow aspen trees glow along McGee Creek (https://www.monocounty.org/places-to-go/lakes-rivers-creeks/mcgee-creek/) near Mammoth Lakes, California (Eastern Sierra Mountains)


[Photo caption:] Yellow aspen trees glow along McGee Creek (https://www.monocounty.org/places-to-go/lakes-rivers-creeks/mcgee-creek/) near Mammoth Lakes, California (Eastern Sierra Mountains)

McGee Creek is well-covered with trees and other foliage, making it a real challenge to actually get to the water, but my son and I were able to find the perfect spot to squeak through. We made it into the creek and discovered this bend with its spectacular, golden aspens. This shot is extra-special because I was able to capture the bright yellow tree with the creek in the foreground and I didn’t even get my feet wet!

I was astonished at how much water was still in the creek even after the dry summer months. And take a look at the right side of the image. See those exposed tree roots? The heavy winter snow run-off caused the creek to swell, washing out the embankment. Mother Nature never ceases to amaze me. . .

Family Get Together Photo Tips

Q: “With the holiday season coming up, what are some tips to take better indoor photos of my family and friends?”


A: Although you may be tempted to try to fit every last family member in one elaborate photo, you’ll end up with better images, if you simply take several close-ups of individual friends and smaller groupings of family members instead. Here are some of my top tips for capturing these kinds of photos:

  • First, when you think you’re close, get closer! A good rule to follow is to fill the frame with the top one-third of your family member’s body.
  • If you’re shooting in the daytime, position yourself with your back to a large, open window, and place the subjects you’re photographing, so that they are facing the window. The window should afford great natural light to help showcase your subjects’ faces.
  • Don’t forget to take close-ups of holiday décor, place settings, or other details to help provide context and set the scene.
  • If you have an iPhone (or other types of phone with a similar feature), use the “panorama” mode to take a photo of the dinner table. Have one person take the start of the panoramic scene from one direction and have another person finish taking the photo from the other direction. (Did you know you can take a panoramic image in both horizontal and vertical directions? You can!)
  • Finally, have fun and take some “selfies” with your loved ones, too. These are great “up-close” moments you’ll all cherish.

Here are a few examples of fun close-ups of holiday celebrations

Q: Do you have any special tricks for photographing flowers and gardens? My garden is starting to wind down, but I still want to get some close-up shots of my squash blossoms, interesting butterfly visitors, and that sort of thing.

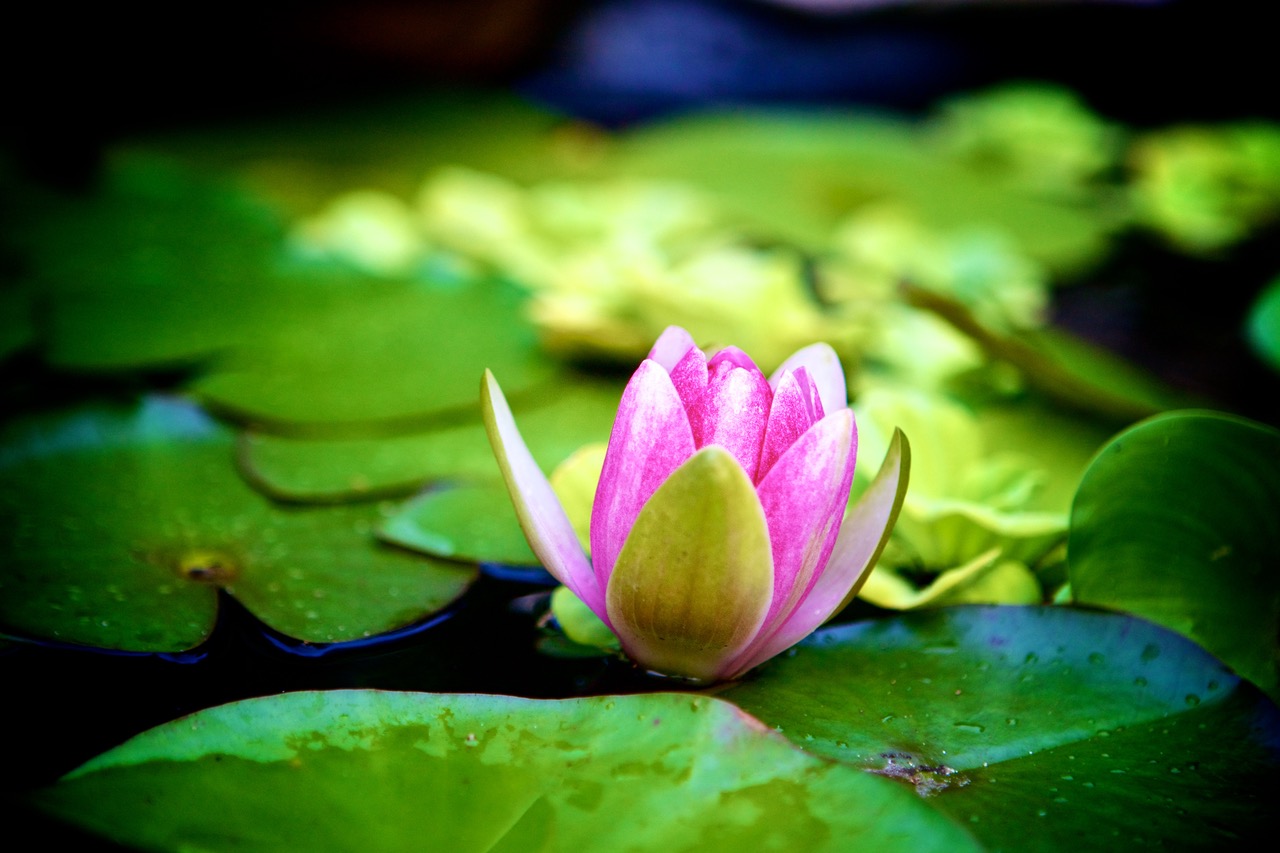
 Above-Left: This water lily image is a great depth-of-field-example. Above-right: Floral close-ups are best shot out of direct sunlight. Below: Referencing the color wheel can help you choose what to include and exclude when framing your garden photo


For best results, you should also compose your shots with certain color combinations in mind. Take a look at the color wheel included in this section to see how different colors work together. Compositions with either analogous or complementary color tend to look best. Some analogous colors found in the garden, for example, would be various shades of green fading into the yellow portion of the color wheel. Complimentary colors, on the other hand, are those found opposite one another on the color wheel. While blue is a primary color, orange, found directly across from blue, is its complimentary color.  You can get some gorgeous shots with minimal equipment, but timing is everything! Get up first thing in the morning for the most “magical” shots. The soft, bright morning light, coupled with dew on leaves and petals, work especially well together. The evening is another good time to shoot. Just avoid harsh, direct sunlight, and opt for soft, indirect light or shade instead.

And, once you have the colors in your shot figured out, don’t be afraid to get really close. As you look for that perfect bud or unfurled blossom, look for bees or butterflies to capture as well! If you have one, use a macro lens on your either your DSLR/Mirrorless or Smartphone. A fellow photographer and “Shot on iPhone Campaign Alum”, Jill Lian, uses Olloclip and Ztylus lenses for all of the macro shots she takes with her iPhone 7 Plus. (Check out her very inspiring macro garden iPhone photography here.)

If you aren’t equipped to get really close, you can still create interesting compositions that tell a story by leading the viewer’s eye through the image. By using wide-open apertures, you can play with depth of field in ways that highlight certain aspects of an image over others. (For wider apertures, use the smaller “ƒ stop” numbers.) With a wide aperture, one flower may be in sharp focus while the rest of the scene will be slightly out of focus.

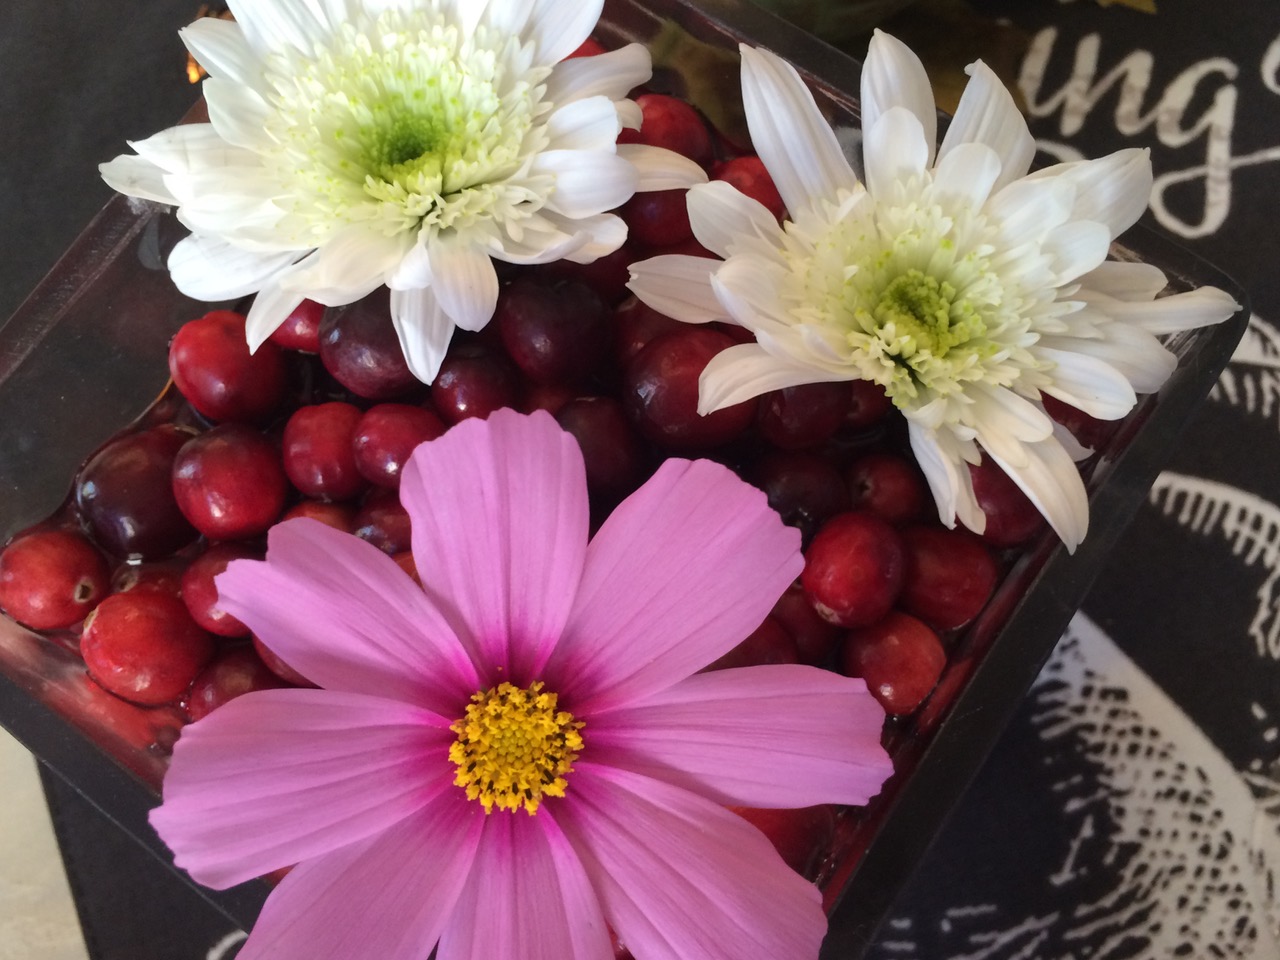
You can also pick a bouquet of your favorite flowers, arrange them in a vase, and photograph your garden bounty this way. And, later, why not allow your flowers to dry and try photographing them in this state, too?

Finally, don’t forget to print your best photos, and place them in a photo album to keep a record of all of your hard work during this garden season!

I’d love to see your garden pics! Tag me on FacebookTwitter or Instagram!

Join the Monthly Newsletter to get monthly updates to your email box!

 [pb-form id=5278]

Orange Beach Glow

Carlsbad Sunset Almost Missed

For every gorgeous sunset, I have been lucky enough to capture on film there are scores of others that get away from me. Sometimes I’m a few minutes too late. Sometimes too many clouds muscle in, obscuring my view. And, sometimes, admittedly, a particular sunset just doesn’t look as spectacular when photographed.

But waiting and watching to see what Mother Nature decides to display is one of my favorite parts of sunset

Orange Carlsbad Glow
A “missed” sunset on the beach in Carlsbad, California.

photography. I snapped this image of a beach drenched in deep orangey-reds during a family visit to Carlsbad, California. My sister, her family, and I had just finished dinner when I looked at the clouds, decided to grab my gear and go hunt the sunset.

We briskly headed to the beach and ran into some friends along the way. Insisting we’d already missed the sunset, our friends walked away from the beach, but we pressed on. The sun itself may have disappeared, but in its place, these fiery, orange clouds materialized. I may not always be able to shoot a perfect sunset, but I think watching what’s left of the sun as it colors the surrounding clouds is certainly beautiful in its own way.

This article was first published in my email newsletter! To get this content delivered to your email box sign up using the form below! Sign up to receive print discounts, downloadable calendars, mobile wall papers and more!